Coast Chassis Shop | Chevrolet Camaro Custom Roll Cage Installation
Coast Chassis Fabrication Of Camaro Rollcage Installation As Seen In Super Chevy MagazineA 200-mph Camaro needs a proper rollcage and Project Unfair now has one
From the June, 2011 issue of Super Chevy
By John Parsons | Photography by The Author
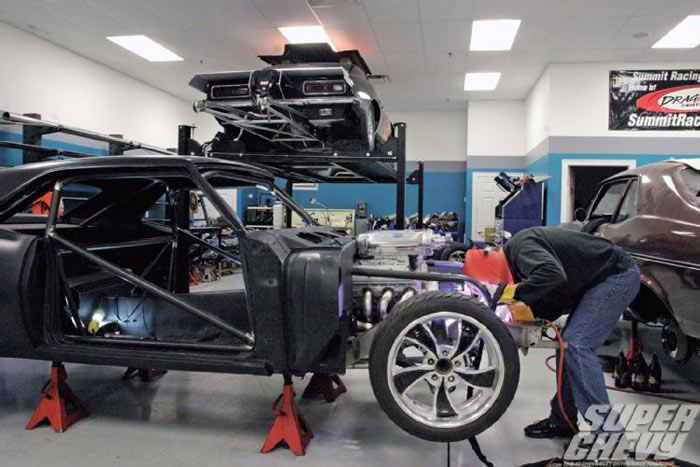
 This month's story about the fabrication of a custom rollcage for our Project Unfair Camaro (from Prodigy Customs and II Much Fabrication) comes from a new location. Coast Chassis Design (CCD) is a chassis shop located at 511 Pullman Road, Unit B-1, Edgewater, FL. 32132, about 40 miles from the author's shop. John Parsons and Frank Serafine of Prodigy Customs opted to have the folks at Coast Chassis do the rollcage from scratch rather than do it themselves or buy a rollcage kit. We'll let John explain why. This month's story about the fabrication of a custom rollcage for our Project Unfair Camaro (from Prodigy Customs and II Much Fabrication) comes from a new location. Coast Chassis Design (CCD) is a chassis shop located at 511 Pullman Road, Unit B-1, Edgewater, FL. 32132, about 40 miles from the author's shop. John Parsons and Frank Serafine of Prodigy Customs opted to have the folks at Coast Chassis do the rollcage from scratch rather than do it themselves or buy a rollcage kit. We'll let John explain why.
Jim Campisano
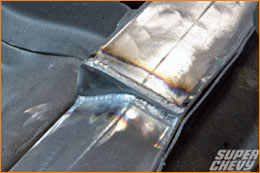
Frank and I have been asked numerous times why we decided to have CCD build and install our rollcage. We've both installed cages before, both separately and working together. And that's the point. We know our limitations, which include our tools and the inevitable compromises of a kit. We also wanted to keep the cage as light as possible and that means using 4130 steel (often called chromoly). Indeed, 4130 is about 30 percent stronger than ordinary mild steel, which means you can use thinner wall tube, reducing weight. However, welding 4130 requires high-quality tube fits with zero gaps so the welds can be kept small to minimize the HAZ (heat-affected zone).
CCD likes to use "Illustration Board," available at your local fine arts store, for templates. It closely emulates 1/8-inch steel (way better than cardboard).
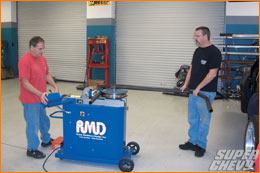
So with all that in mind, we approached Coast Chassis Design to see if it would be interested in building a rollcage for Unfair that satisfied both NHRA and NASA (road racing) requirements. We met with Pete Bonafide and Tim Christ (co-owners of CCD) to see if they were interested.
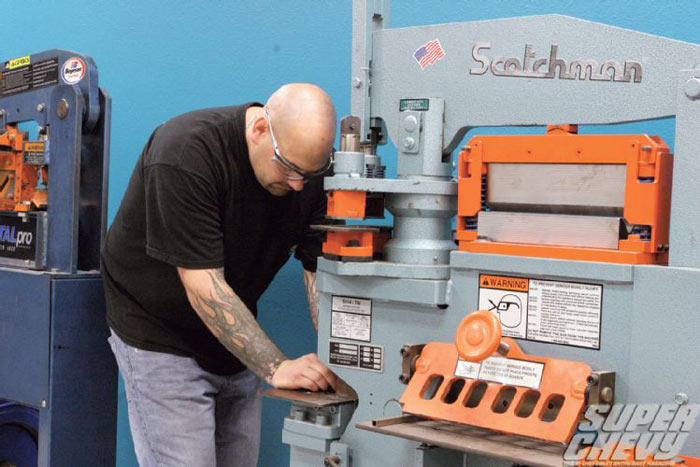
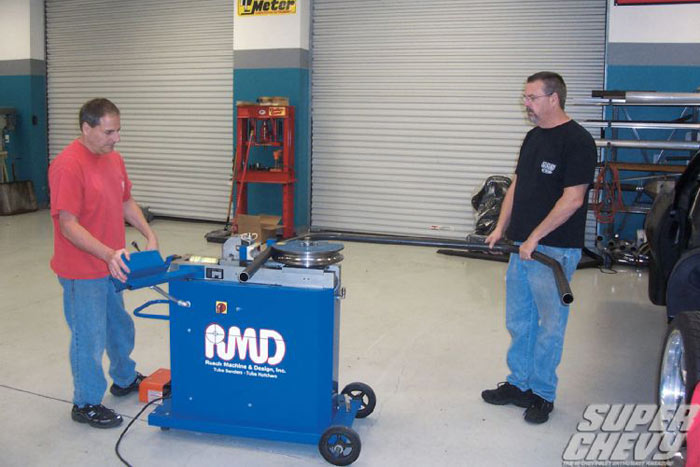
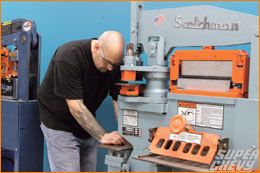
All it took was to have a look around at their unbelievable shop and we were hooked. TIG welders, tube benders, lathes, mills, iron workers, bandsaws, tube notchers, sheetmetal brakes, and bead rollers were all on full display. The shop was spotless, and several chassis were in various stages of completion. In the middle of the shop was their latest 10.5 tire/6-second bad-boy Mercedes AMG featuring a full-tube chassis, Funny Car engine, and more tricks than Madonna. Pete and Tim were intrigued by our 8-second drag strip requirement, along with streetability and our road-racing goals. They've built many cages over the years, and ours was a simple one in their book.
Speaking of books, the first thing to decide about the cage is the proper diameter and wall thickness of the tube itself. The NHRA requires 1 5/8-inch tube with .083 walls for 4130. NASA's rulebook has a whole section on tubes and wall thickness, but is oddly silent about 4130 tube for 3,500-lb cars (which is the high-water markUnfair better not weigh more than that). It does allow for 1 3/4 tube and .120 wall for DOM (mild steel) tube. After much consideration and a consult with some NASA rules officialswhich really didn't helpwe decided to use 1 3/4x.095 4130 tube.
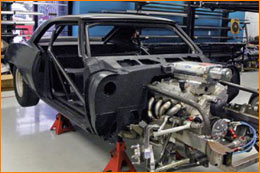
From there, we moved on to the shape and look of the cage. The term rollcage came about because of its obvious requirement to keep the roof of the car from collapsing on the driver in the event of a rollover. While that requirement is important, rollcages also improve the performance of the car, and they do that by stiffening the chassis. Tim takes it a step further. He designs his cages to not just stiffen the overall chassis, but also to provide additional support at all the suspension points. And that means a lot of points the number of tube junctions welded to the floor or frame to the cage. There are 16 in all.
Keeping the moving parts down to just what's supposed to move improves the basic repeatable performance of the car, and allows tuning efforts to focus on things like springs, shocks, and pre-load. If your four-link brackets are moving around as you launch at the strip, or the front subframe is twisting instead of the front springs compressing, it's hard to have consistent responses when you change the springs or adjust the linkage bars.
Another consideration is the ability of a well-placed bar to provide a convenient and strong place to attach parts. The under-dash bar is mounted high and will be used for holding the steering column, pedals, evaporator, and stereo components securely. The sill and harness bars are intended to provide the proper anchor points for the seats and body restraints.
Finally, something else to remember: Those tubes are hard! It's important to position the tubes (especially the ones around your head) to give yourself the most clearance so that the thing that is supposed to save your life doesn't harm you or turn your brain into mashed potatoes.
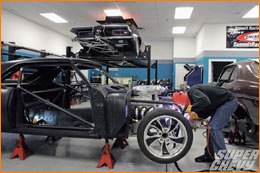
CCD builds its cages around the main hoop, like nearly every other cage I've seen done. Next, though, Tim and Pete put in the back braces. Tim says, The back tubes are hard to get lined up correctly, especially with the package tray and rear firewall already in the car. So I like to do them before moving up front. From there, the main hoop is tied to the subframe connectors, and then to the 4-link brackets.
After that, comes the most difficult part the side tubes from high on the main hoop to the floor by the passengers' footwells but Tim has a trick to make it easier to weld and a bit stronger. The brow bar (above the windshield) and under-dash bar follow. Sill bars and finally door bars complete the cabin portion of the cage. The final difficult part is the front J-bars that tie the front suspension and motor mounts into the rest of the cage.
In my continual quest to improve my own TIG welding, I pumped Tim for as much information as he'd give me about his welding technique and machine setup. All the welding was done on an ancient Miller machine about the size of a Toyota Prius. The foot pedal is so old it looks like World War II surplus.
There's nothing magical about the welding machine, to say the least. Tim uses a water-cooled torch, which really helps when you're trying to run a bead in an awkward spot since the cable is more flexible than an air-cooled torch, but the rest of his setup is decidedly ordinary: standard collet body, 3/32-inch tungsten, 1/4-inch stick-out (except when digging into corners), 22 CFH argon flow, and narrow cup.
His secret is simple: dozens and dozens of cages built. He's welded in all the uncomfortable positions many, many times. For those impossible spots at the top of the bracing tubes into the main hoop, he can weld it by feel without actually looking at the puddle. I guess that's something like Jimi Hendrix playing guitar behind his back. I say guess because I'm sure I'll never have that degree of skill.
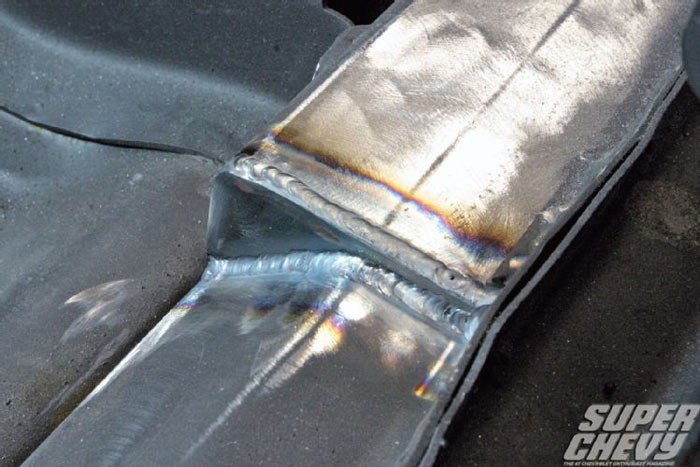
There are two other things I noticed: thorough cleanliness and fast puddle movement. The two things work together. A clean puddle with no mill scale or other contaminants will move faster (and penetrate deeper) and that really helps keep the size of the HAZ down, which is vital when welding 4130 steel.
One other thing to mention: Tim uses mild steel rod (ER70S) when welding 4130. That's the recommended filler according to Lincoln Electric and Miller Welding.
Now follow along as Pete, Tim, and Denny Steward build a world-class rollcage. Read more:

|
|
 |
|